Lockwood Lavender Farm is no longer open to the public.
Sunday, February 18, 2024
Thursday, April 13, 2023
Friday, December 30, 2022
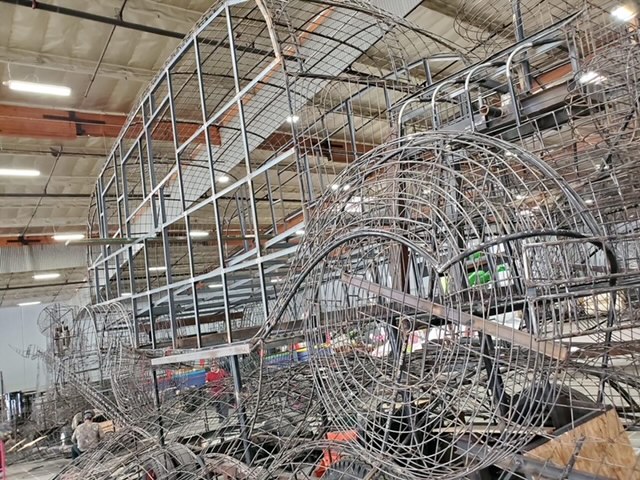
A Look Behind the Scenes At How The Rose Parade Floats Are Made
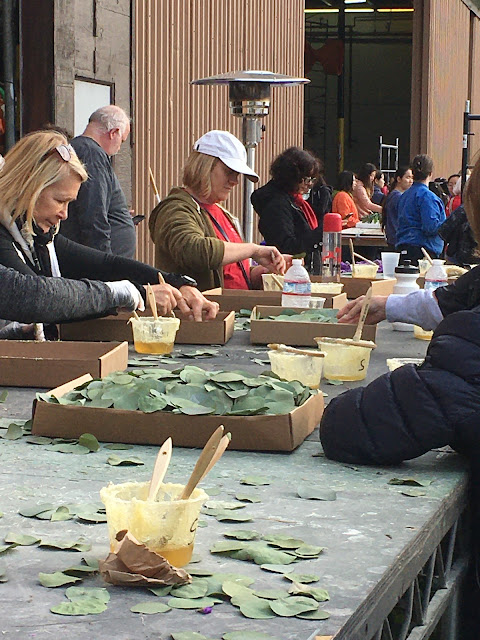
One activity on my bucket list has been to decorate floats for the Rose Parade in Pasadena, California. So for 5 years we have been participating in gluing, tubing and pushing in flowers for a number of beautiful floats. So I thought I would share behind the scenes of the last days before parade day.
The Rose Parade features two types of float entries: floral-decorated sponsored by a participating corporation or community organization. Floats designs must be approved by the Pasadena Tournament of Roses Committee. Final Floats are approved in February and construction begins right away.
The first Festival of Roses Parade took
place in 1890 as a promotion for Southern California's sunny winter weather.
Today, most major floats are designed and
constructed by professional builders featuring high-tech computerized animation
and exotic natural materials from around the world. Each float costs between
$50,000 and $200,000 or more and takes up to a year to create. The floats are
built in large warehouses by professional florist and volunteers.
The
self-propelled chassis is the heart of the construction, but the mechanics
should not be visible. Even though it is the most necessary piece, the chassis
is ignored when the crowd watches the parade. A chassis can sometimes be
salvaged and reused for a new float, depending on the design. All of them are
built to support the structures that will eventually be covered in flowers.
The float is then sprayed with polyvinyl plastic liquid, and then painted generally in the same color that corresponds with the flowers that will be on that part of the float.

Barrels of dried goods from cranberry seed, rice,
soy beans, statice, pumpkin seeds and other dried goods.
3 types of glue are
used on most floats. One is similar to
Elmer’s glue for seeds, and ground flowers… another is a specially designed glue…
Similar to rubber cement that is extremely effective for gluing flowers and
won’t cause browning! And finally, a spray adhesive for those hard-to-reach
areas and things that are stubborn… like moving parts… they need extra stickiness! Builders will go through 125 gallons of glue
per float.
16 feet 6 inches… NO TALLER! All the floats have to travel under Highway to
reach the parade route… so all floats have to collapse to a maximum of 16 feet
6 inches. So many parts are built on giant pistons to raise and lower them
throughout the route!
On January 1, the
judges verify the awards for various categories before the parade starts. The
parade route covers 5.5 mi (8.8 km), and it takes about two hours for all the
floats to pass the starting line. More than one million line the route, many of
them having camped there all night to get good viewing spots.
Monday, July 12, 2021
The Farm is now closed for the season.
We want to thank you for your continued support of our family farm. The Farm is now closed for the season. We will continue to harvest the remaining lavender in the field and distill for essential oil. You can purchase our Lavender products at Rhubarb Kitchen and Garden Shop in Skaneateles, NY. 315-685-5803.
Wednesday, July 7, 2021
How to Make Lavender Wands
1. Harvest the lavender early in the day, and make sure that the flowers are not damp. Strip all the leaves from he stem. Line up the bottom of the flower heads and tie them gently together with the end of the 2 yards of ribbon. See picture 1.
2. Turn the bundle upside down and gently bend each stem down around the blossom heads. You can facilitate this step by scoring the underside of the stem section that is being bent with your fingernail. When all of the blossoms are "in a cage of stems" the long end of the ribbon should be pulled out of the cage, the short end tucked inside.
3. Line up all of the stems evenly around the blossoms, making sure that they do not overlap. See picture 2. Start to weave the ribbon under and over the stems. Gently pull on the ribbon to make sure the weave is tight. The most difficult part of this process is in the first two rows of the weaving. On the second row you should be going under the stems that you had gone over on the first row. See picture 3.
4. Continue weaving until you have covered all the flowers. You can use a toothpick to push any buds that stick out back into the weave or rub them off. Wrap the ribbon around the "neck" of the wand and tie a slip knot.
Trim the stems to the same length and continue to wrap the stems until you reach the end and glue the ends. Tie a bow around the neck of the stems.


.JPG)
.JPG)


